Provisioning Package & Directory Setup
This document covers the hands-on setup steps required before running the migration, including creating the provisioning package with Windows Configuration Designer (WCD) and preparing the Active Directory disjoin account (for Hybrid/AD-joined devices).
2.3 Provisioning Package Preparation (WCD)
In order to facilitate device registration and migration, a provisioning package must be created using the Windows Configuration Designer (WCD) tool.
For Hybrid-to-Entra migrations:
- Create the provisioning package using the current (source) tenant’s Microsoft Entra account.
For Tenant-to-Tenant migrations:
- Create the provisioning package using the destination (target) tenant’s Microsoft Entra account, as the device will join and enroll into that tenant after migration.
This ensures the device enrolls correctly into the intended Microsoft Entra and Intune environment during the migration process.
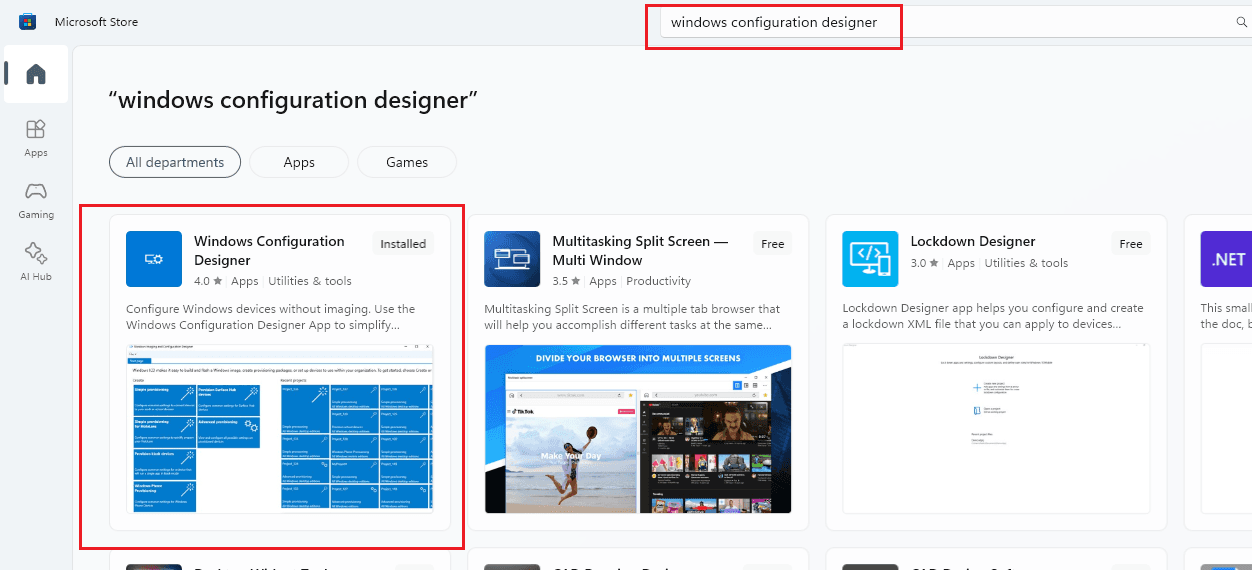
Step 1 — Download Windows Configuration Designer (WCD)
Download and install Windows Configuration Designer from the Microsoft Store:
The Microsoft Store is required to be accessible on the PC designated for provisioning package creation. This process is a one-time setup that is generally completed on the IT administrator’s workstation.
Step 2 — Launch Windows Configuration Designer
Open the Start menu and launch Windows Configuration Designer.
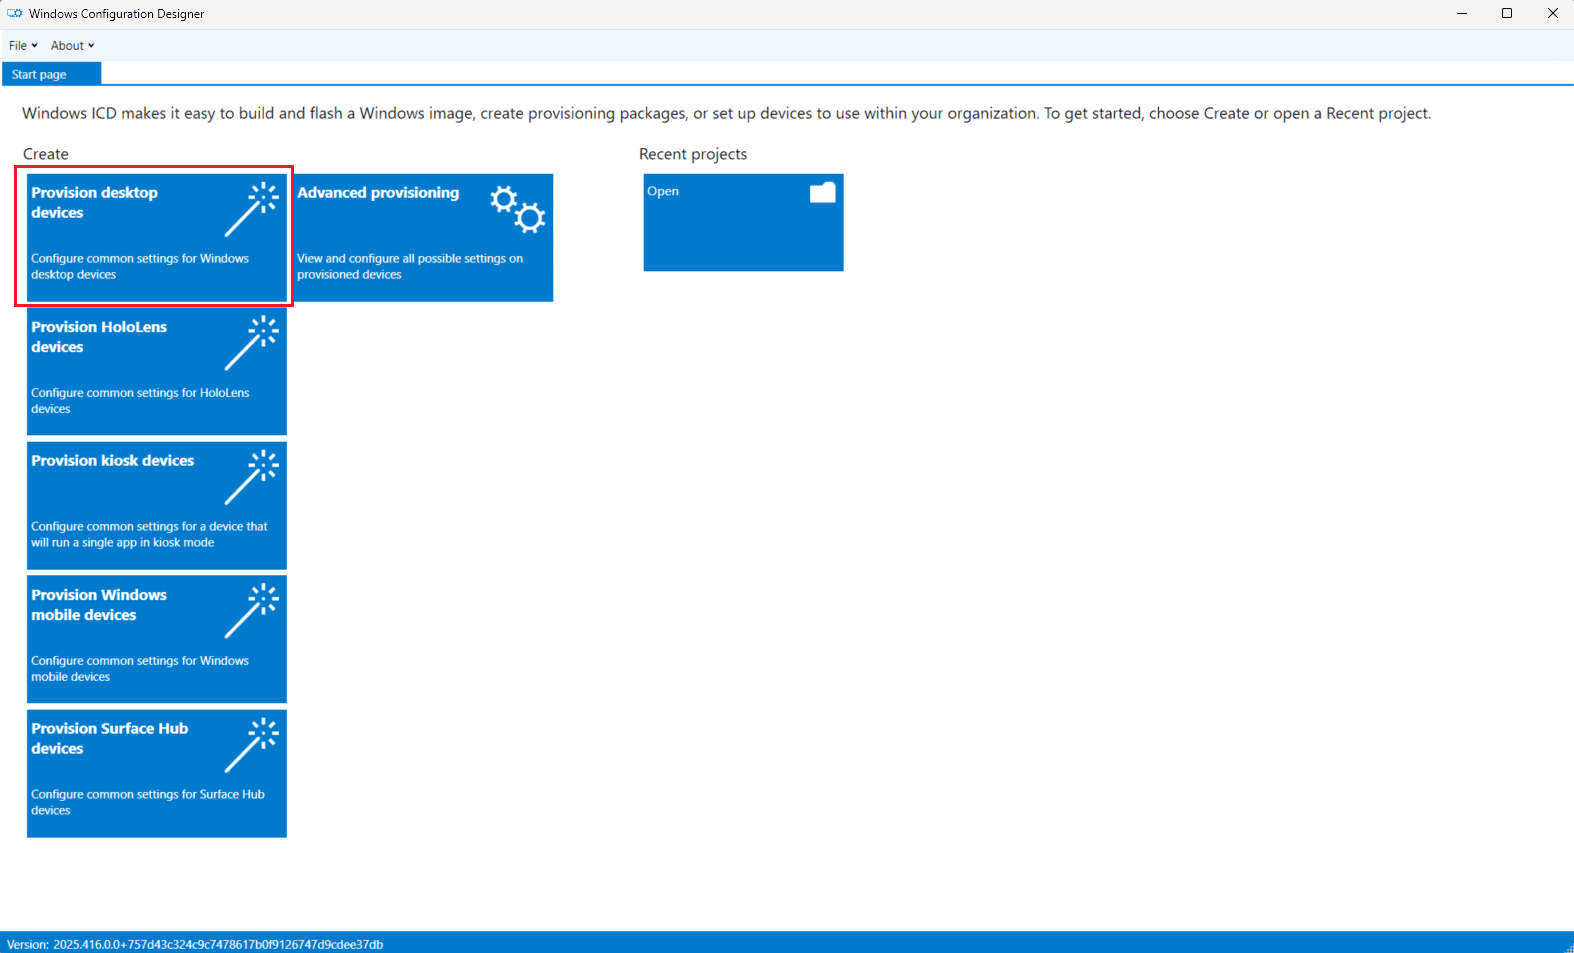
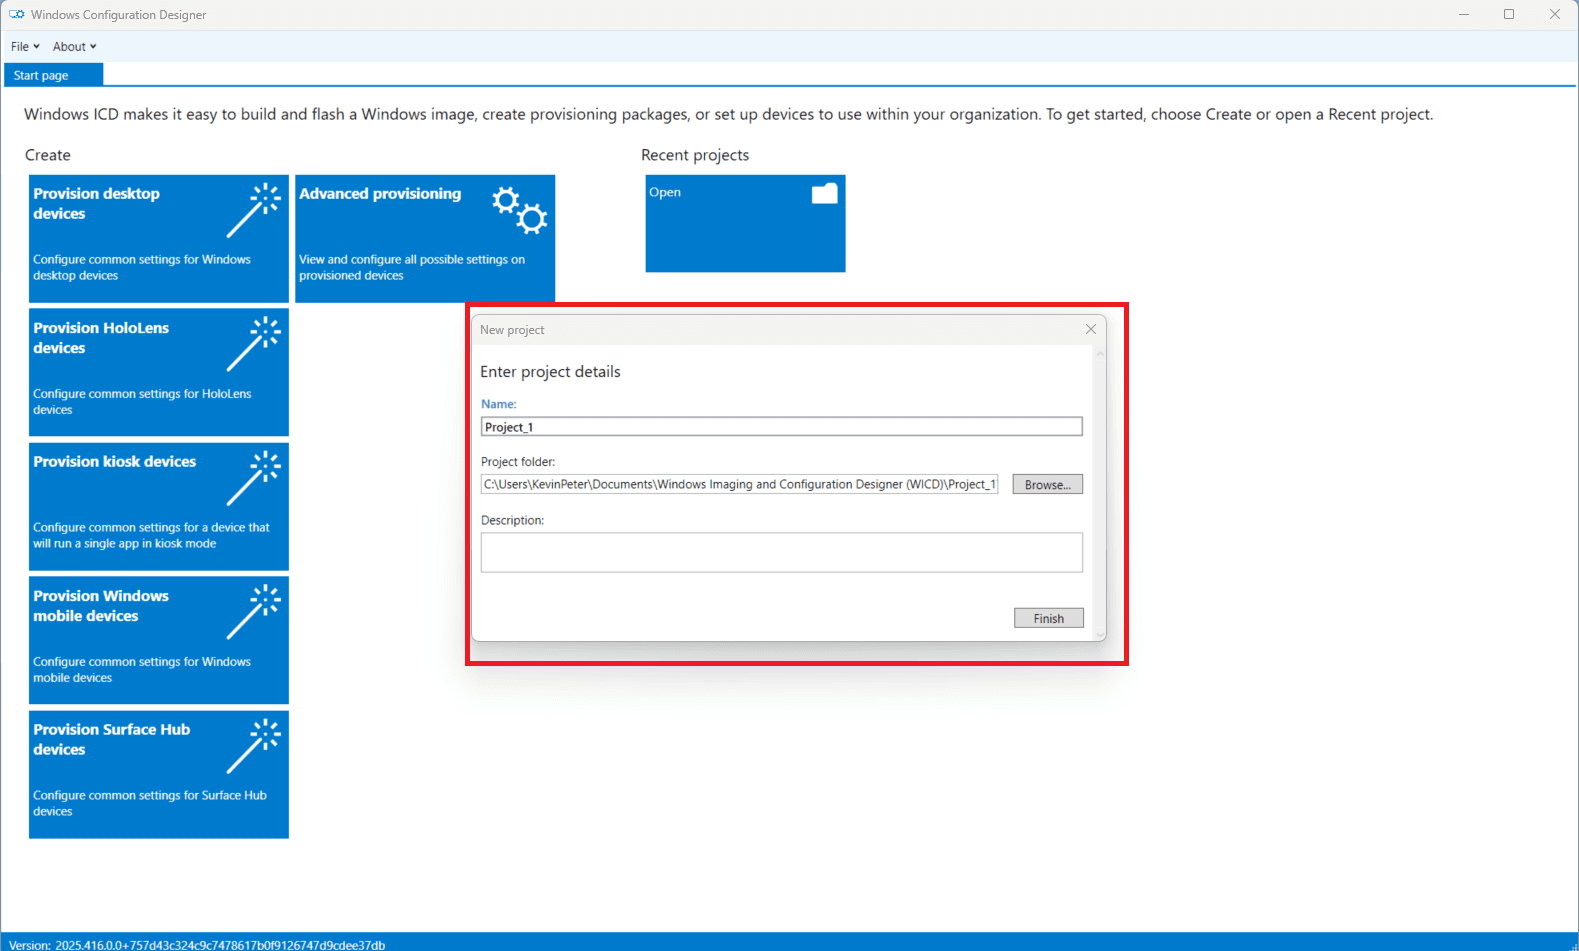
Step 3 — Create New Project
-
In the WCD home screen, select Provision desktop devices under the Create menu.
-
In the New project popup:
- Enter a name for your provisioning package and path.
- Click Finish
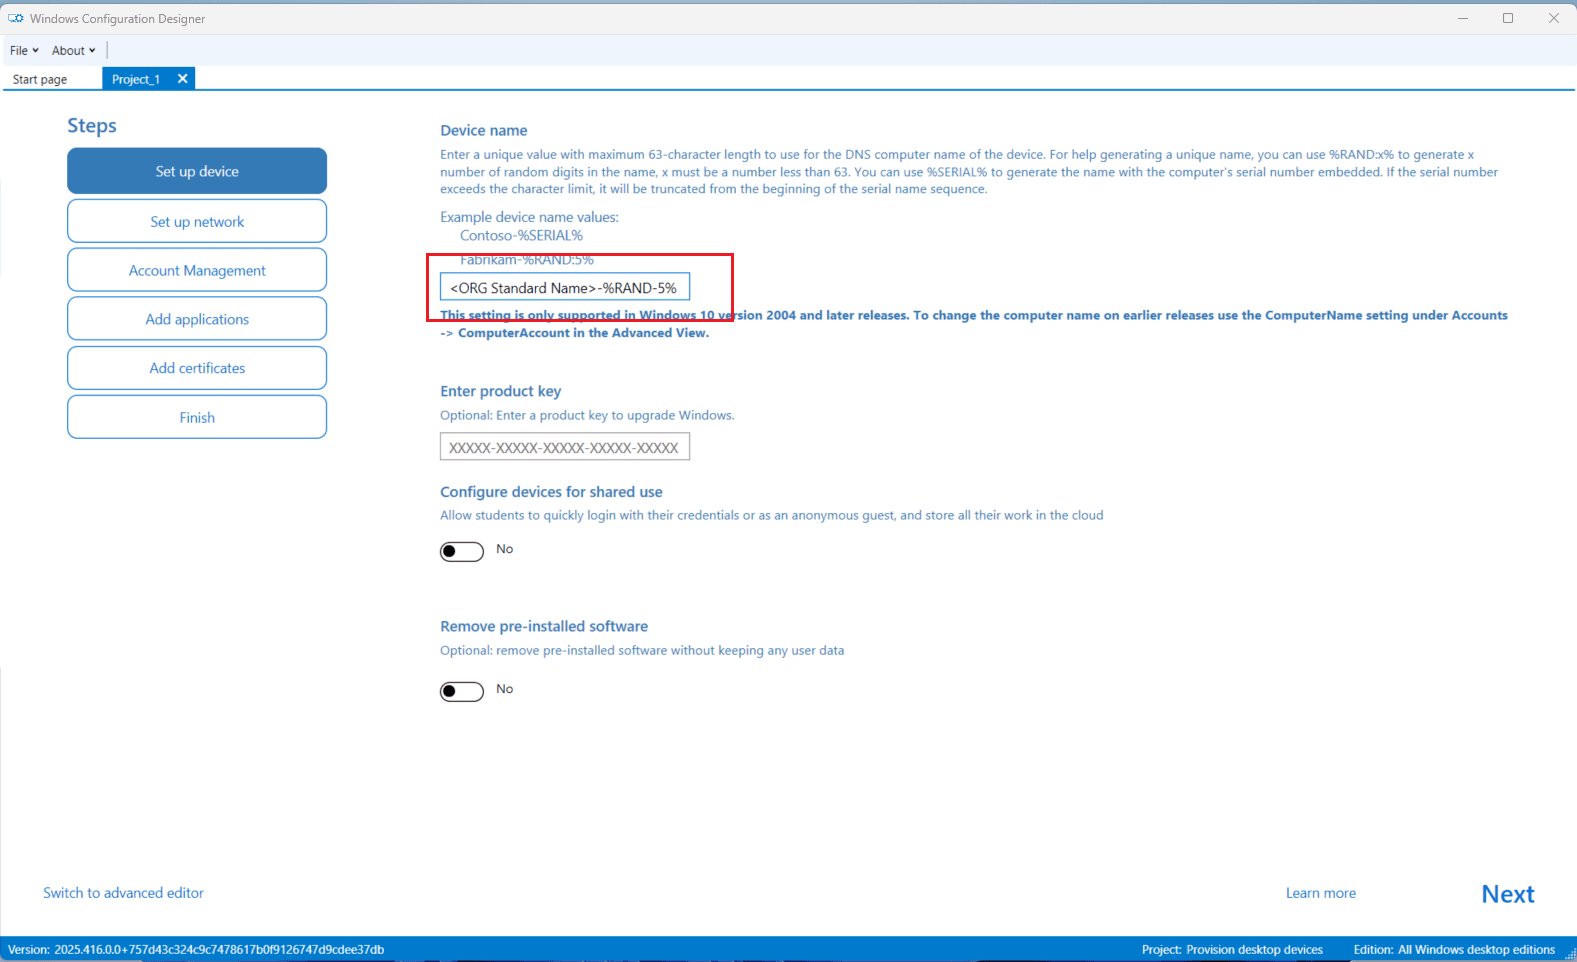
Step 4 — Configure Device Settings
- Under Set up device, define a naming template for your PCs (e.g.,
IT-{SERIAL}). - Click Next.
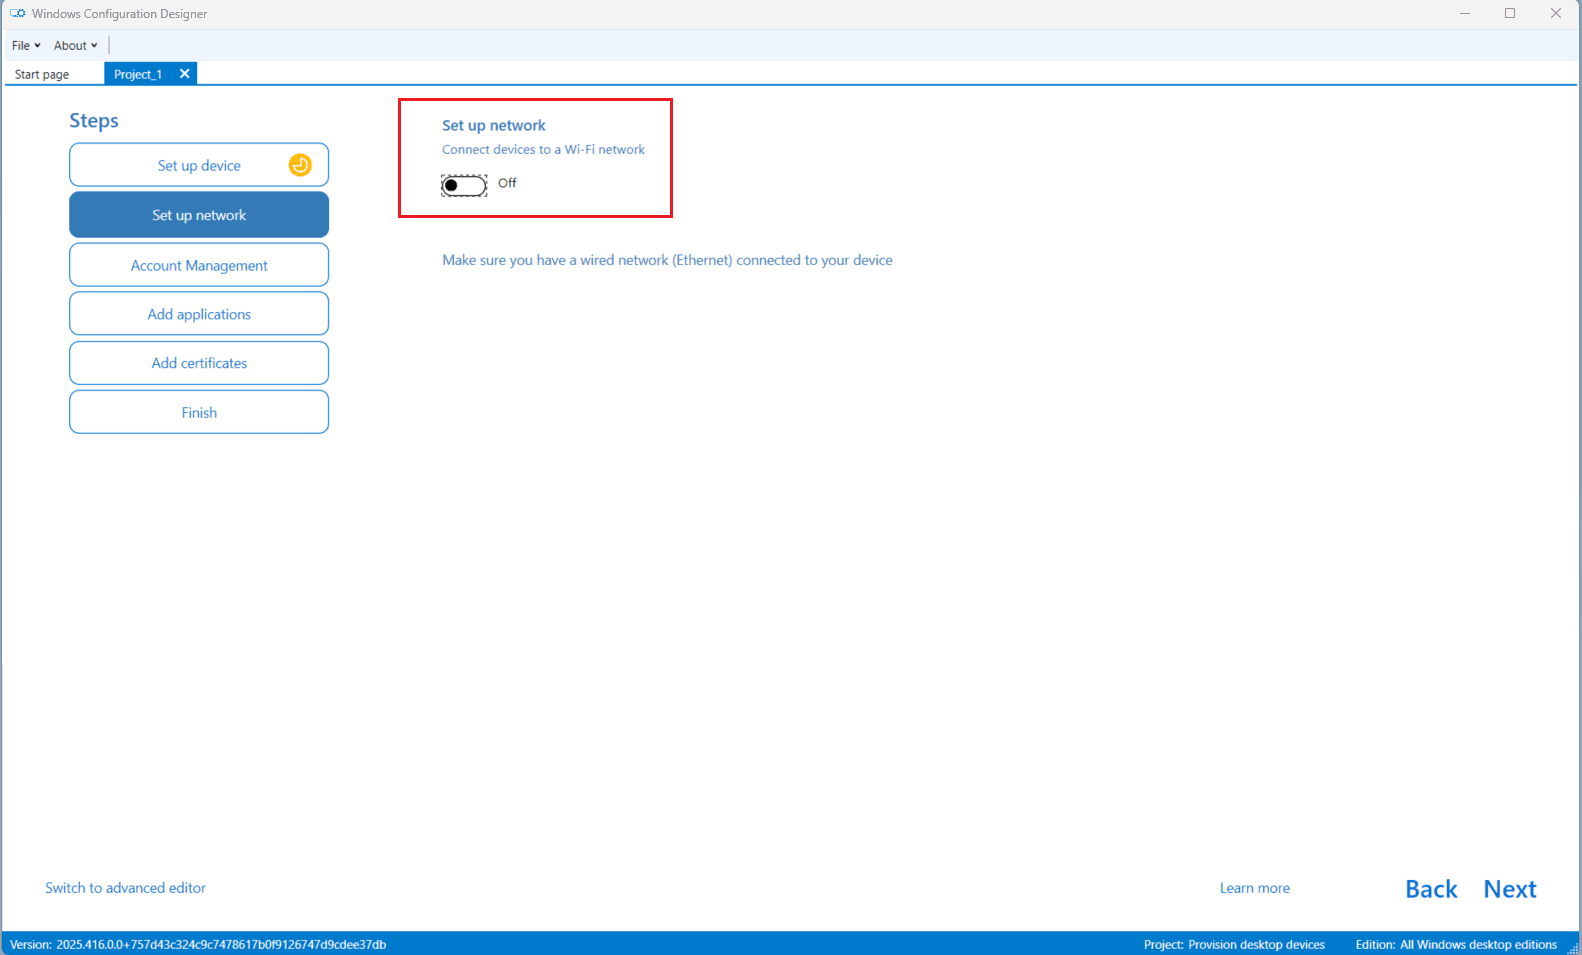
- In Set up network, toggle Connect device to a Wi-Fi network to Off.
- Click Next.
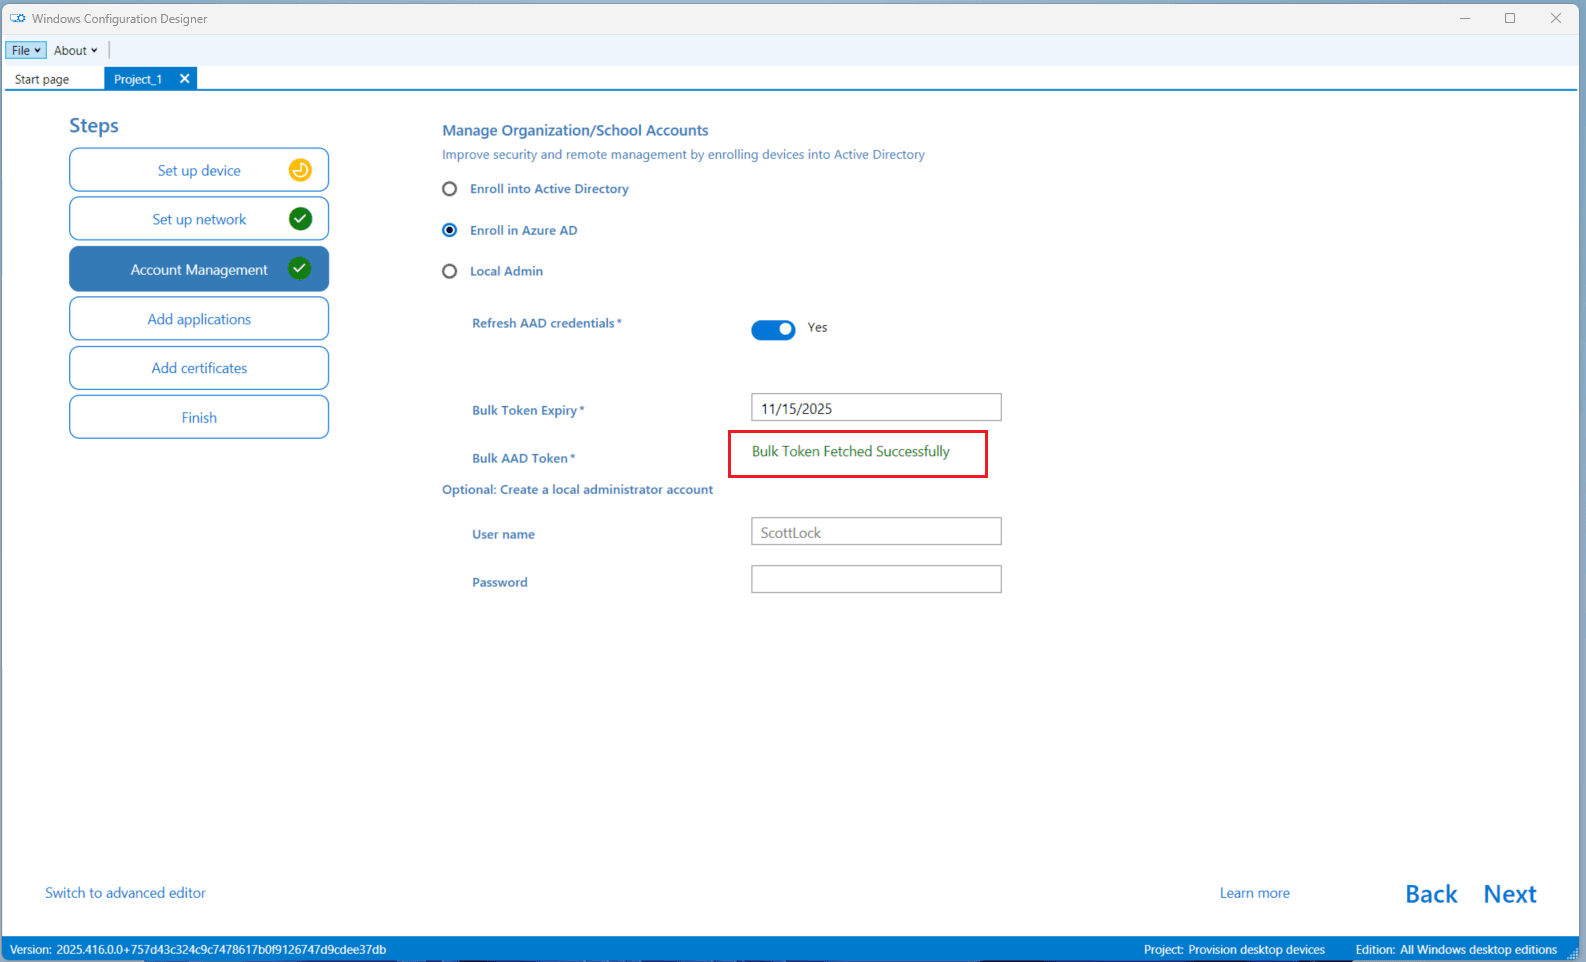
Step 4 — Enroll with Bulk Azure AD Token
-
Under Account Management, do the following:
- Choose Enroll in Azure AD under Manage organization/school accounts.
- Toggle Refresh AAD credentials to Yes.
Use the appropriate Microsoft Entra account based on your migration scenario:
Hybrid-to-Entra migration:
- Sign in with the current (source) tenant account.
Tenant-to-Tenant migration:
- Sign in with the destination (target) tenant account to ensure the device is enrolled into the correct tenant after migration.
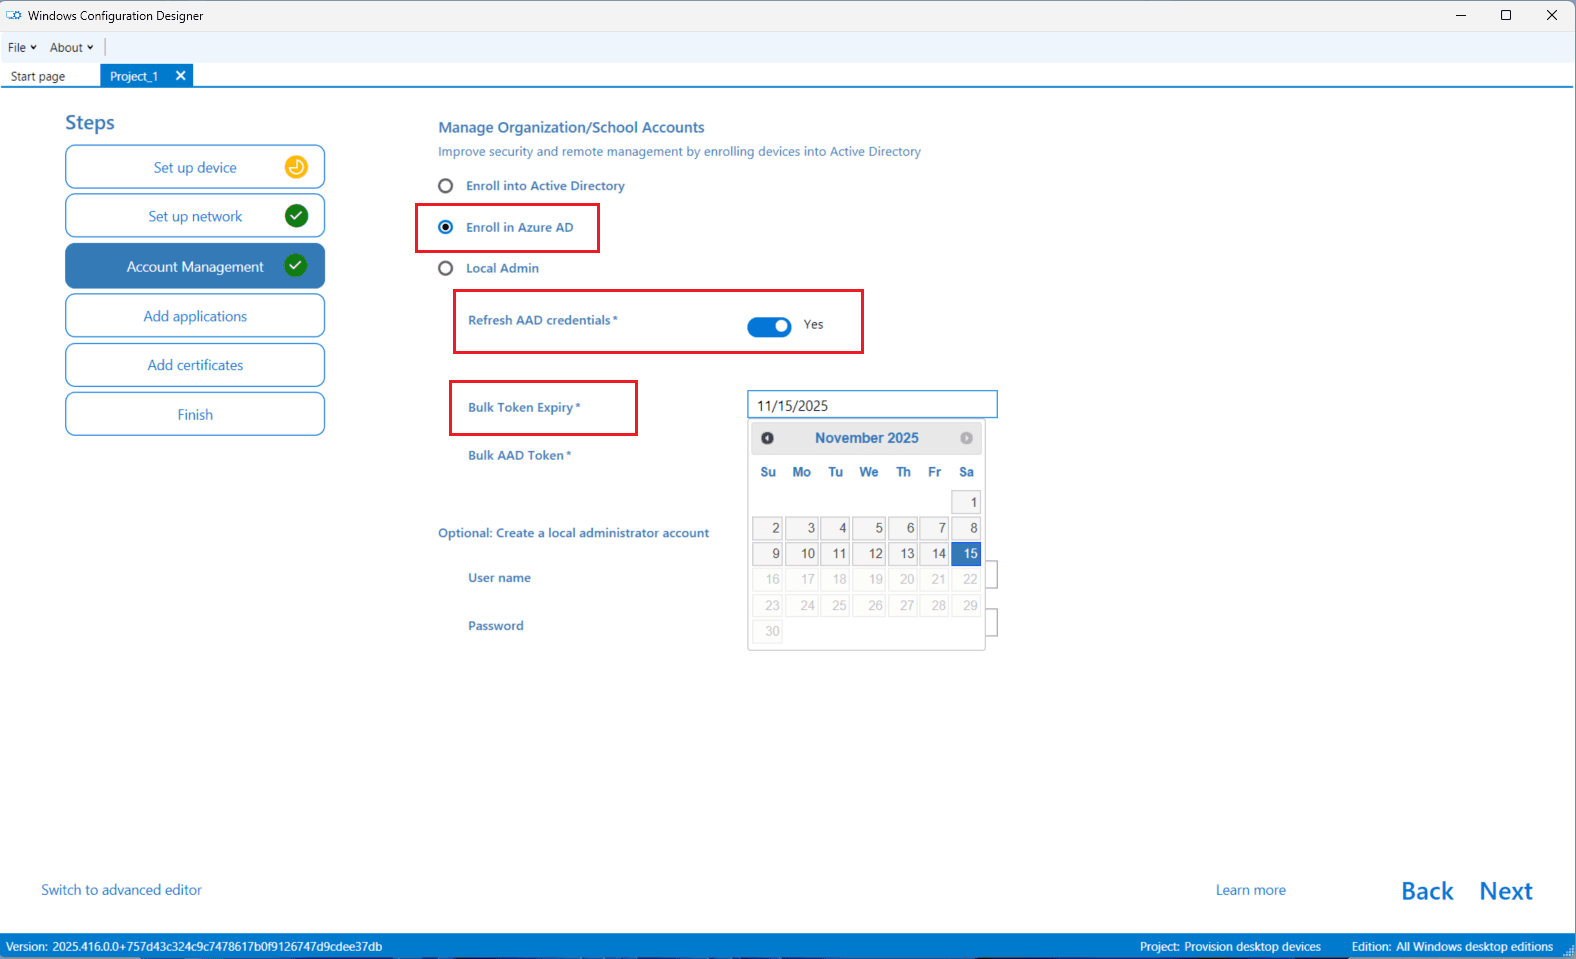
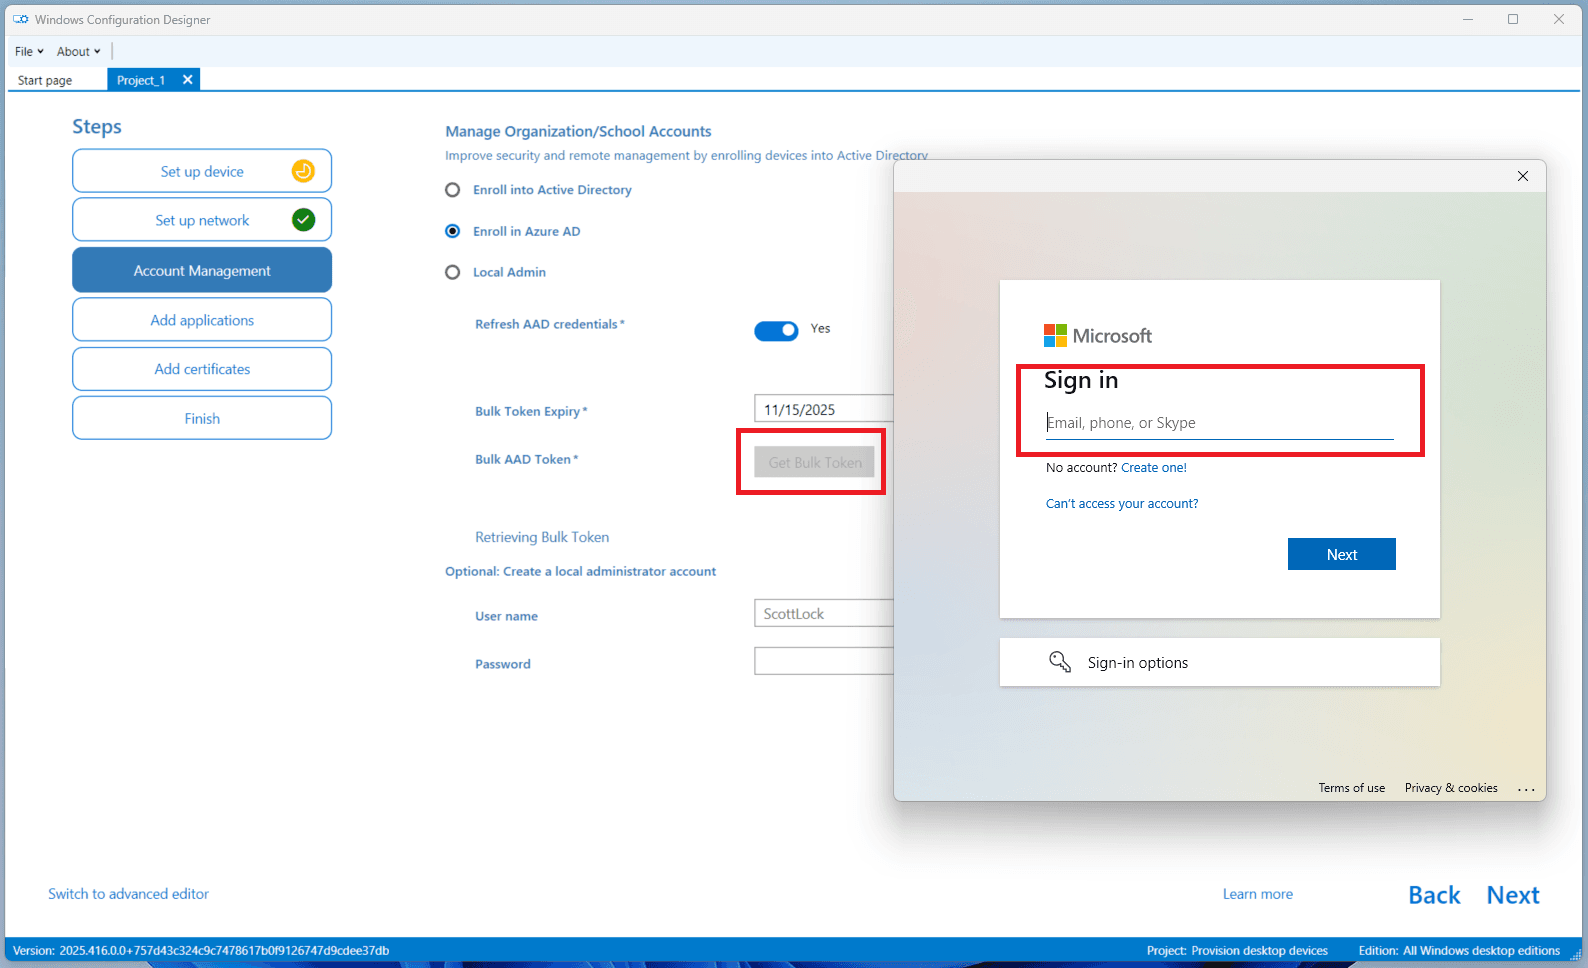
- Click Get Bulk Token and sign in with Global Admin credentials when prompted.
-
If this is your first time using WCD:
- You will see a permissions consent screen.
- Click Consent on behalf of your organization.
- Then click Accept.
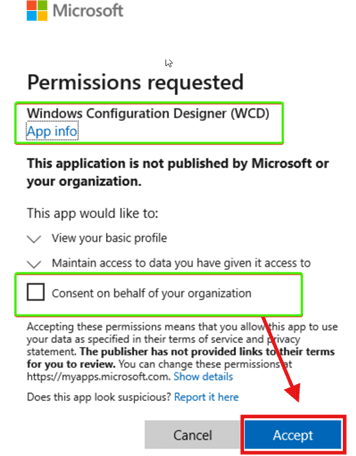
- You should see a confirmation message: ✅ Bulk token was fetched successfully
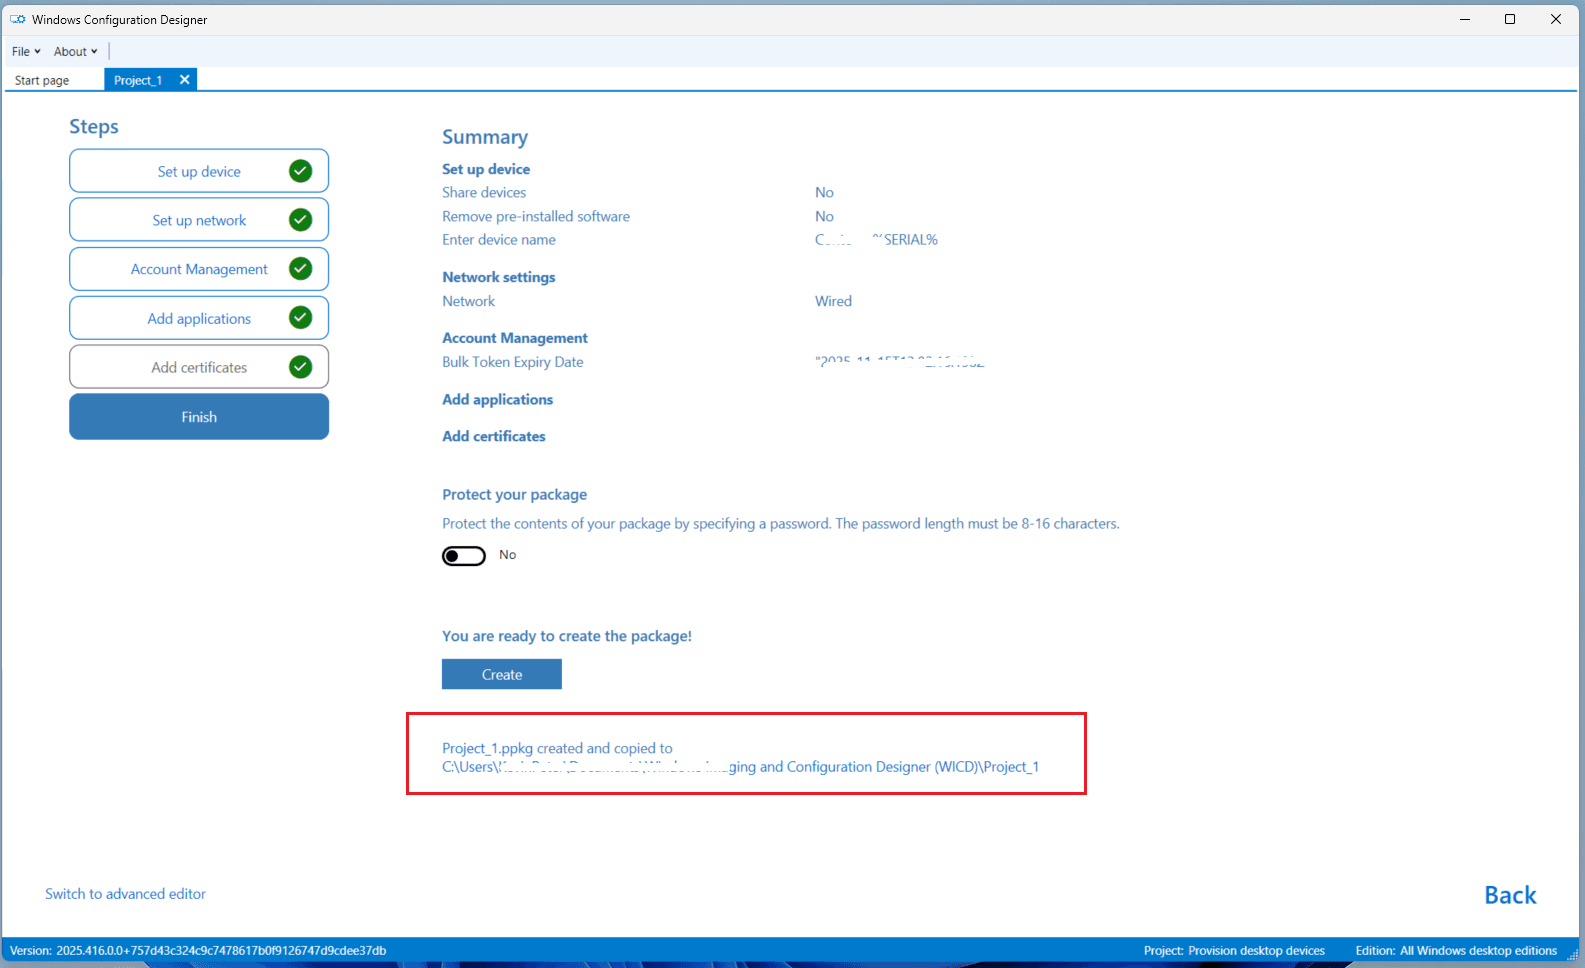
Step 5 — Complete the Package
- Skip the Add applications and Add certificates screens by clicking Next.
- On the Summary screen, verify all configuration details.
If you wish to retain the existing PC name post-migration, skip this Create step and refer to Step 6 below.
- Click Create.
- After creation, a file path to the
.ppkgfile will be displayed.
Step 6 — (Optional) Remove Computer Name from Package
If you need to retain the existing computer name after migration:
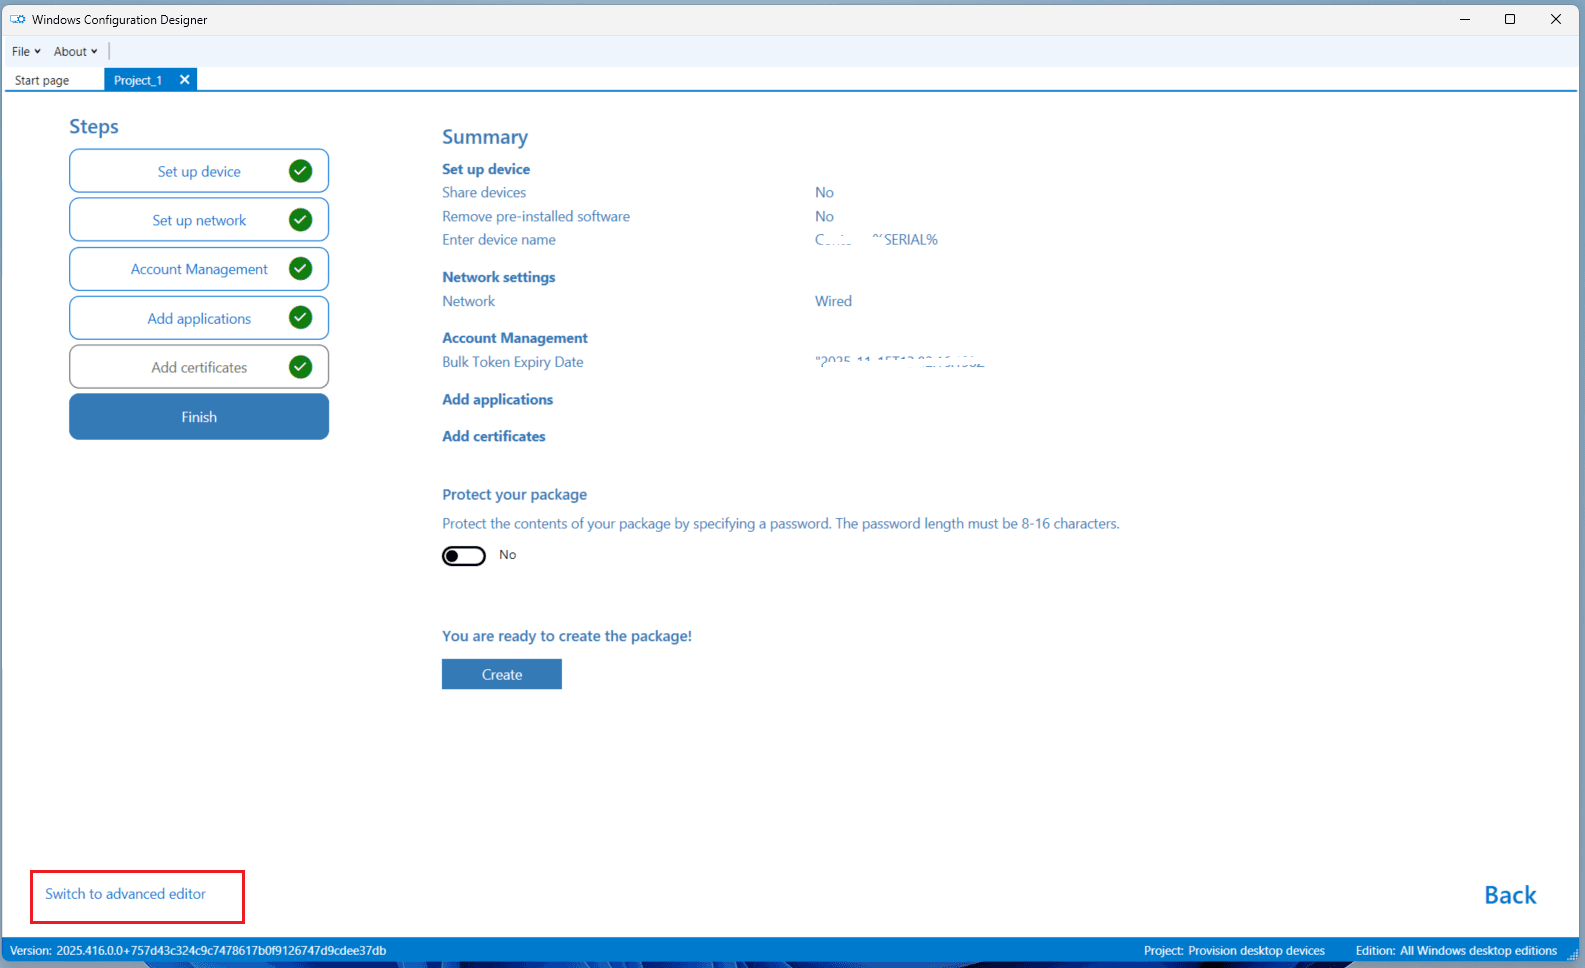
- In WCD, click Switch to advanced editor.
- Search for the Computer name object.
- On the right-hand side panel (under
Runtime settings > Identification), select DNSComputerName. - Click Remove.
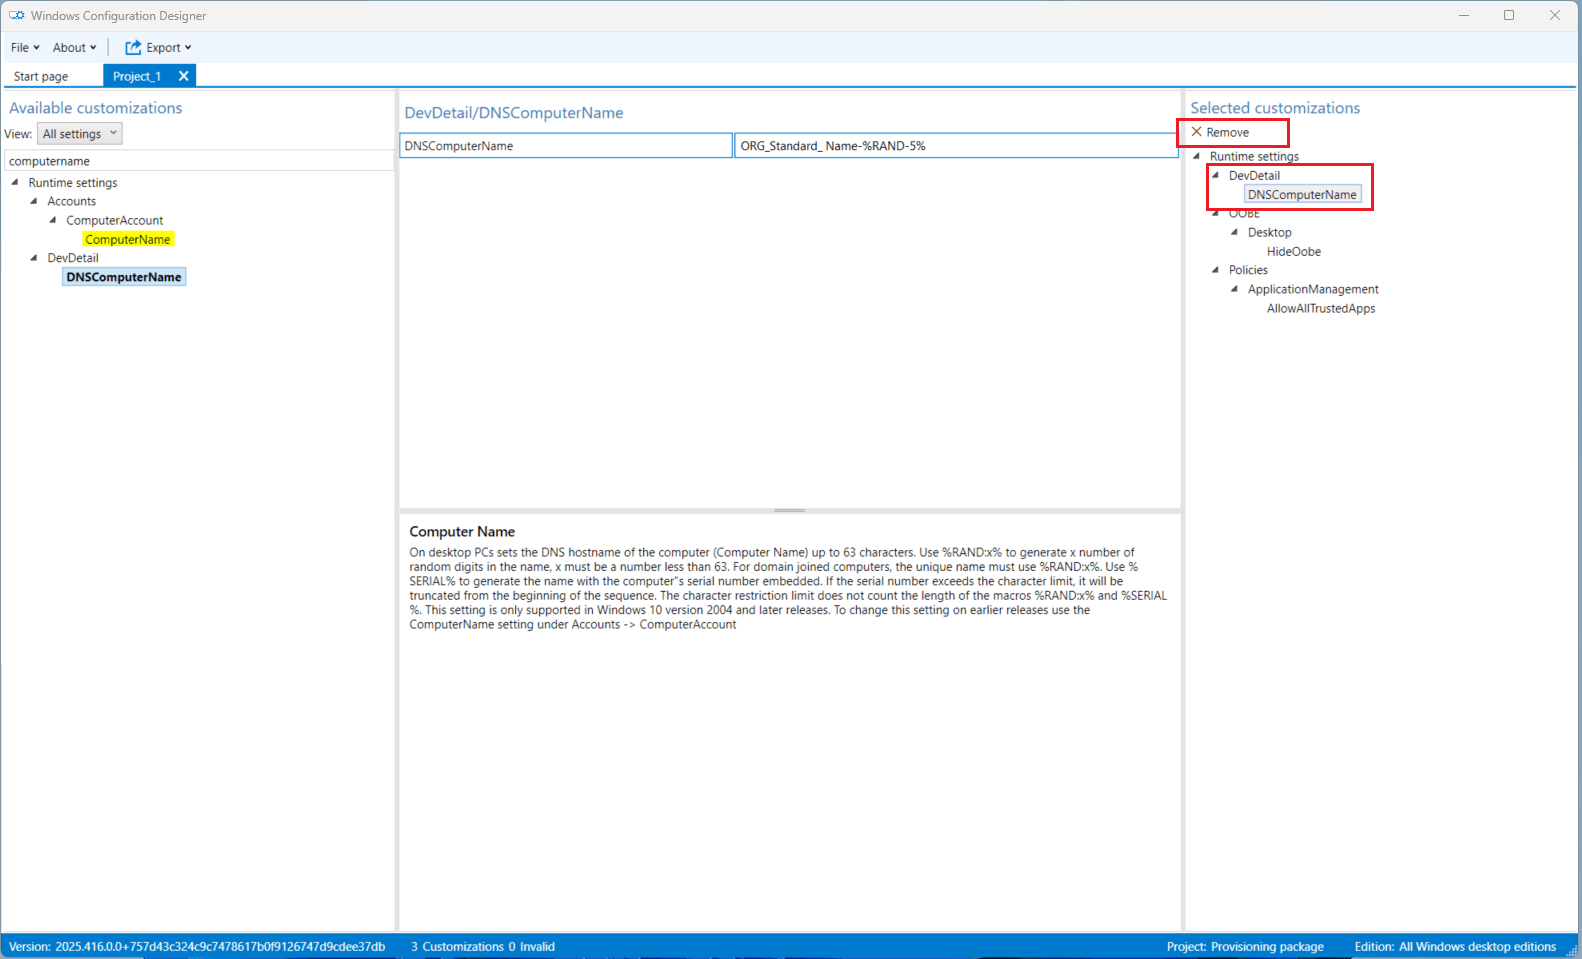
- The computer name setting will now be excluded from the package.

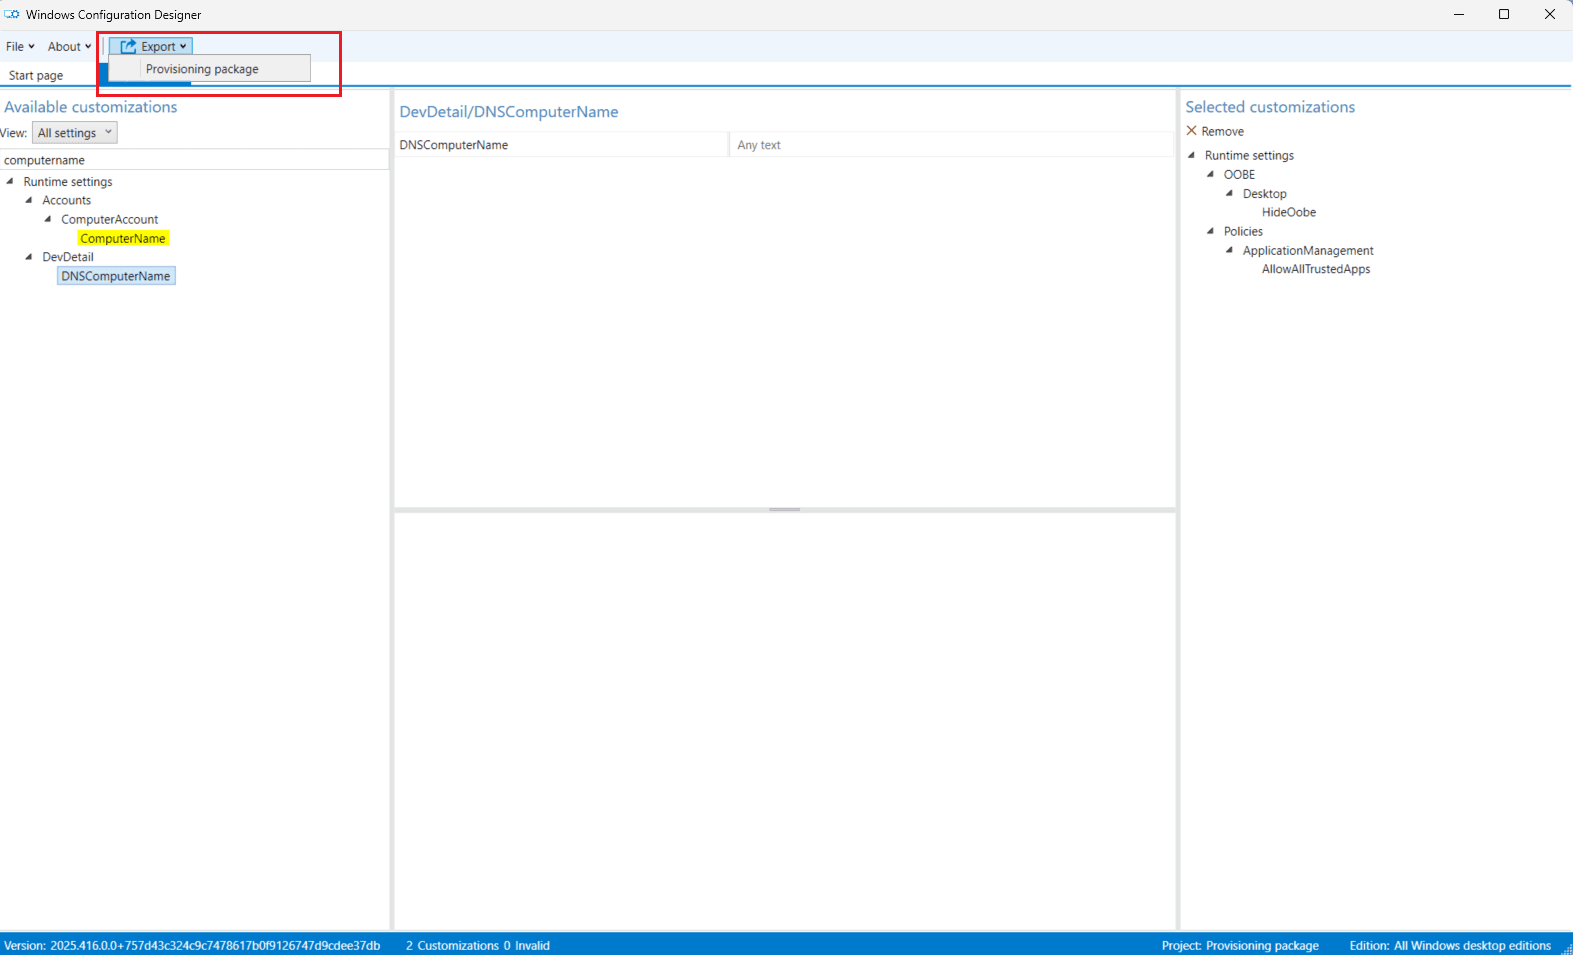
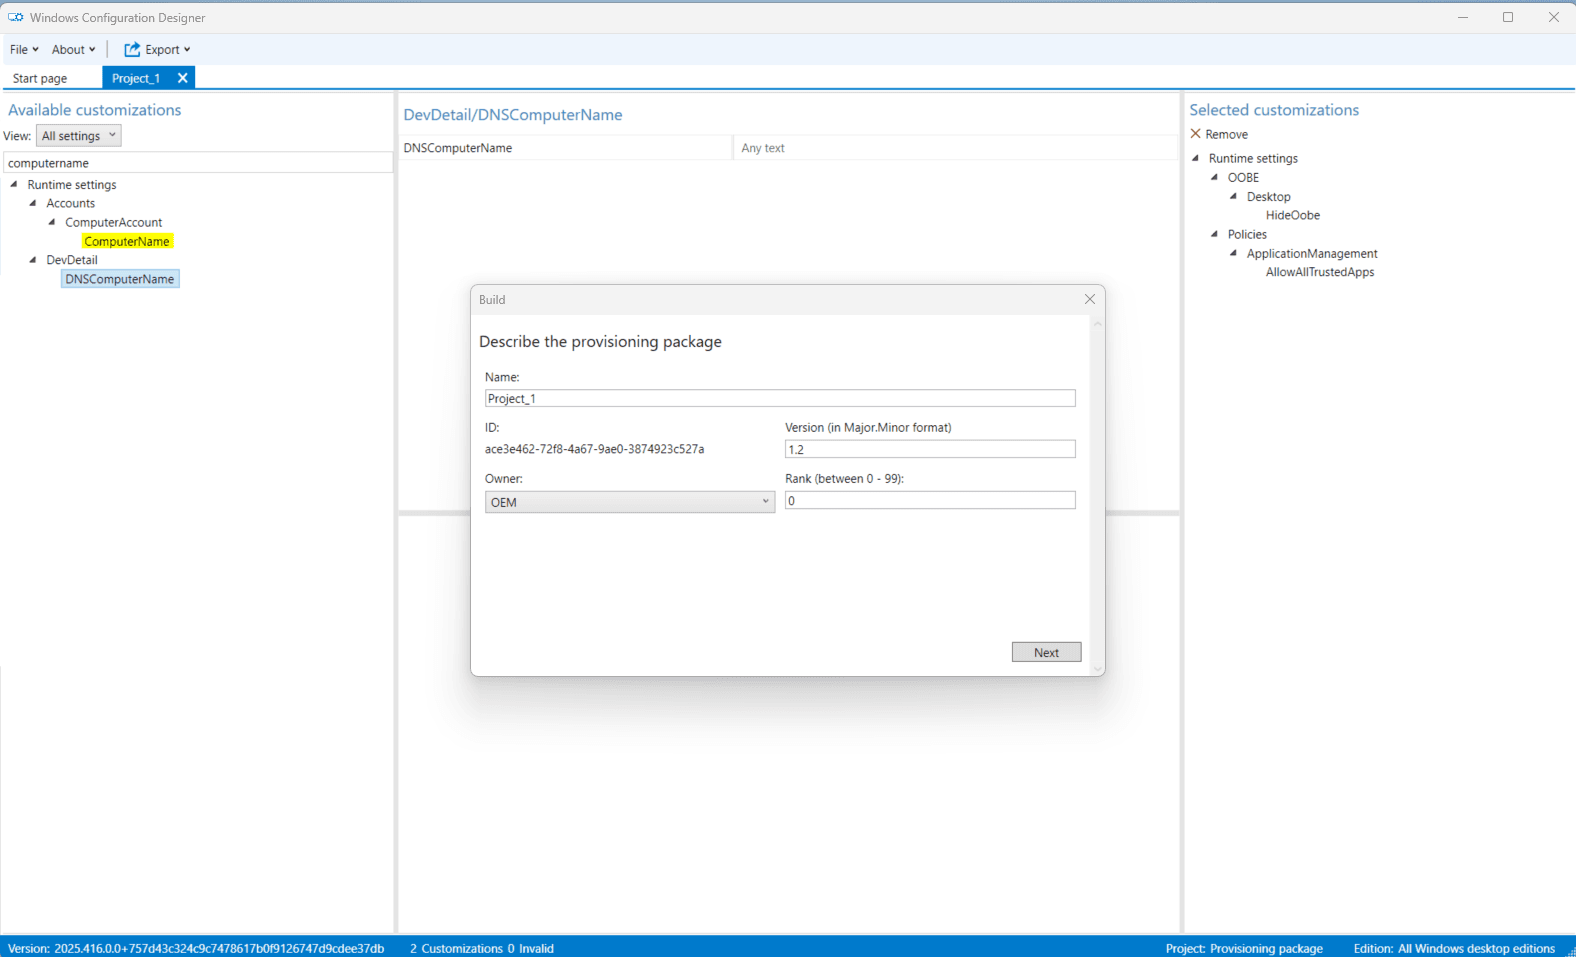
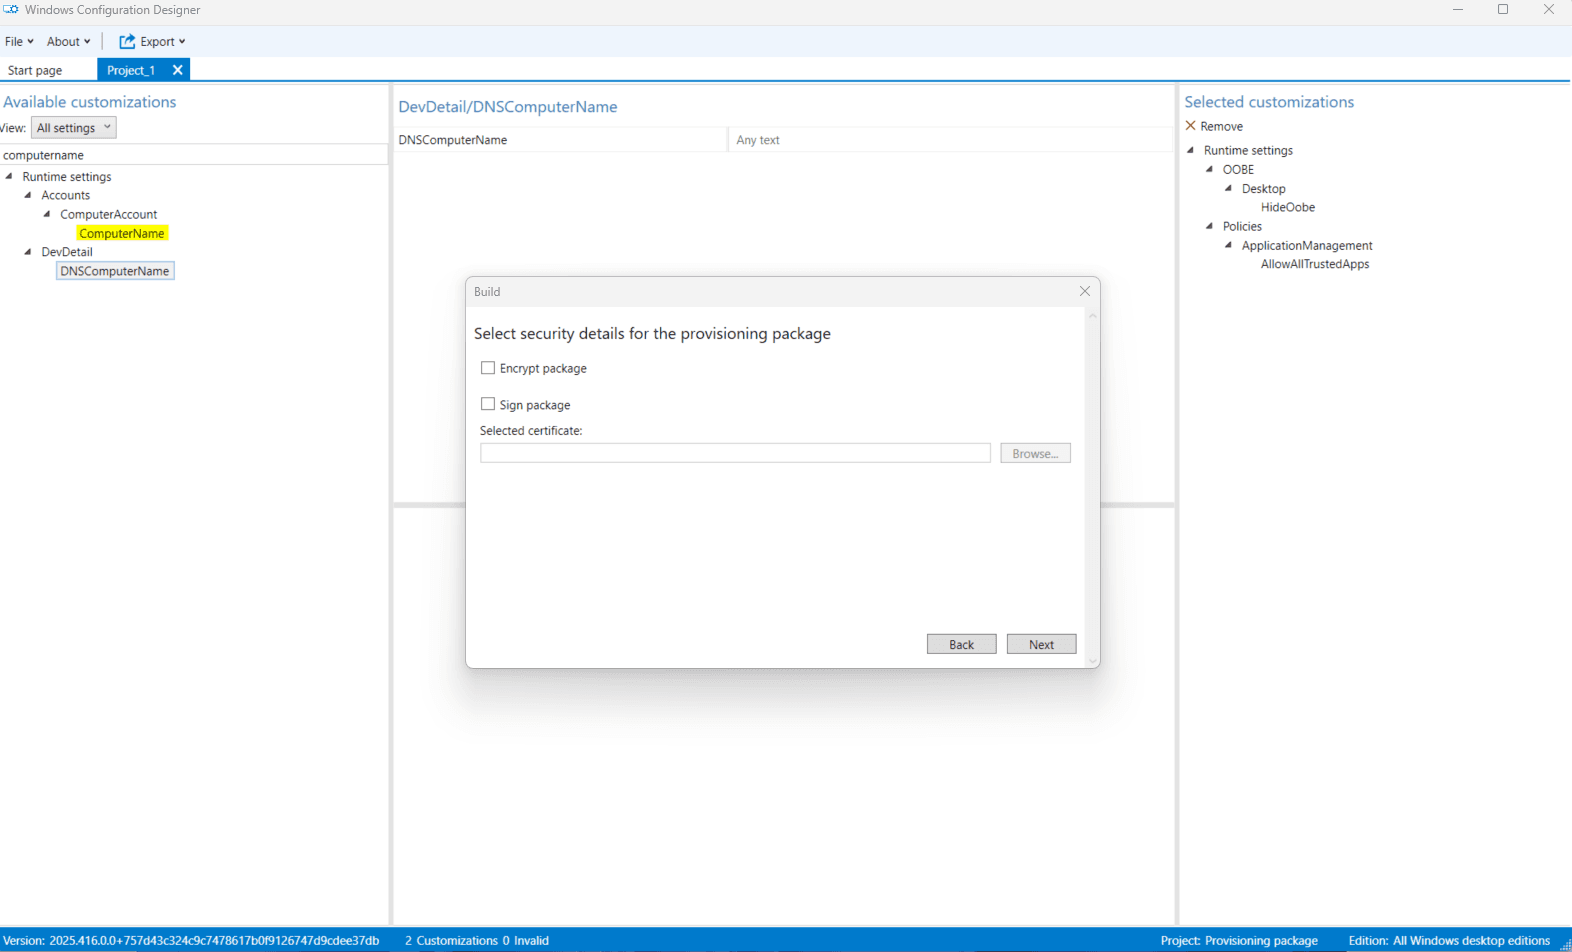
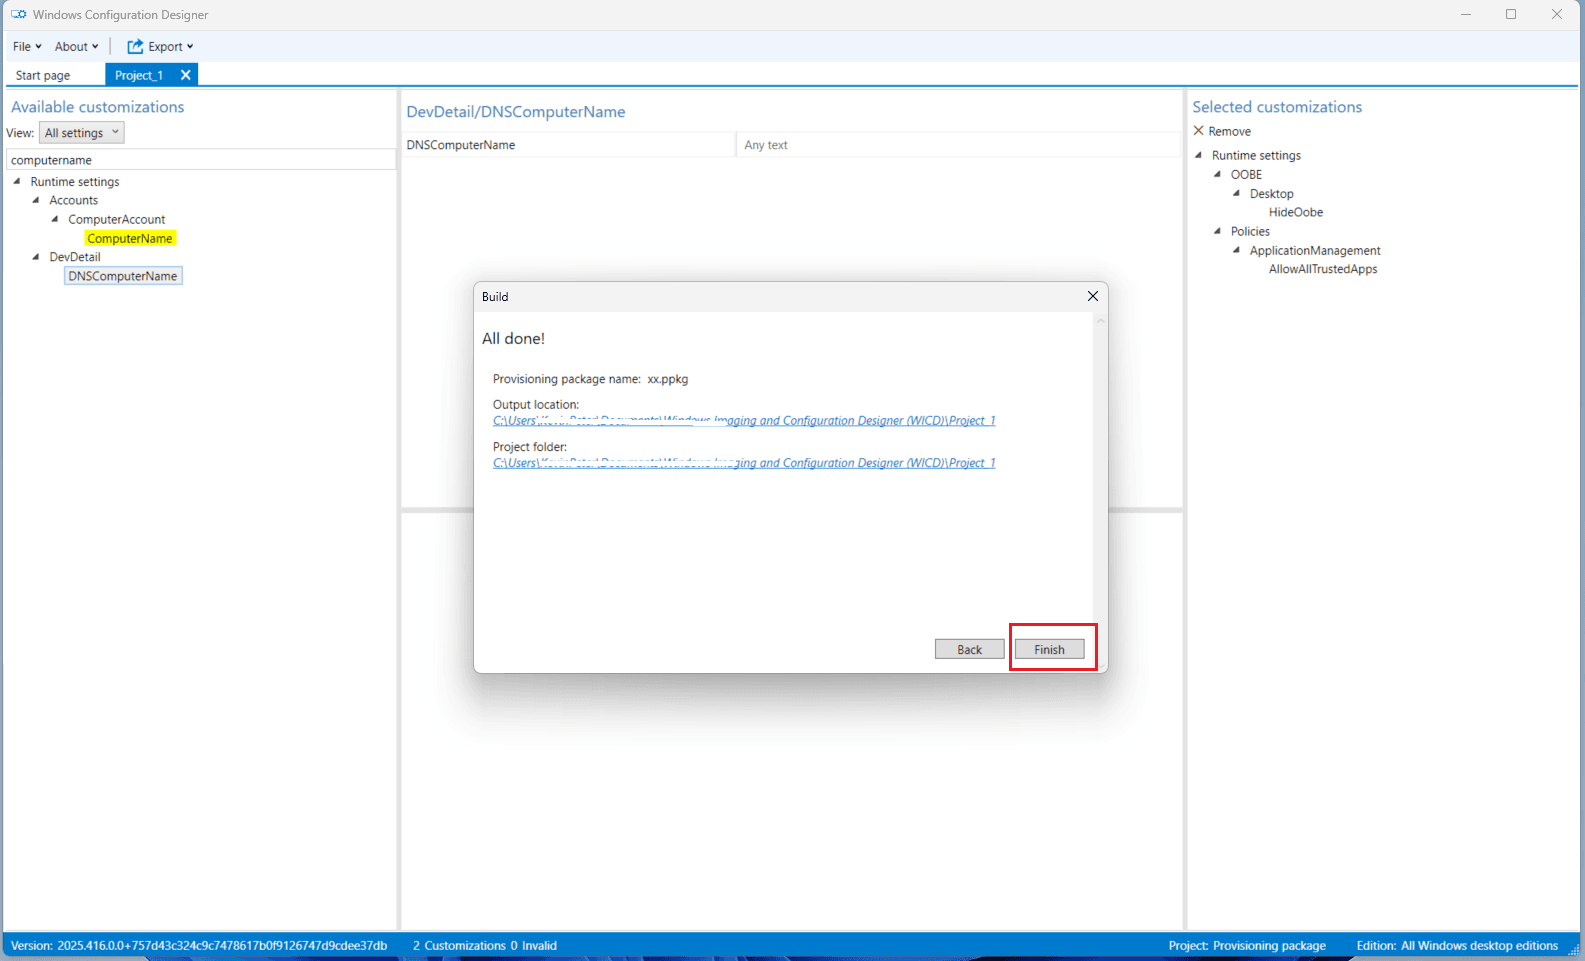
Step 7 — Export the Final Provisioning Package
- Click Export → Provisioning package.
- Enter a file name, then click Next.
- Leave security settings as default, click Next.
- Choose the destination folder, then click Next.
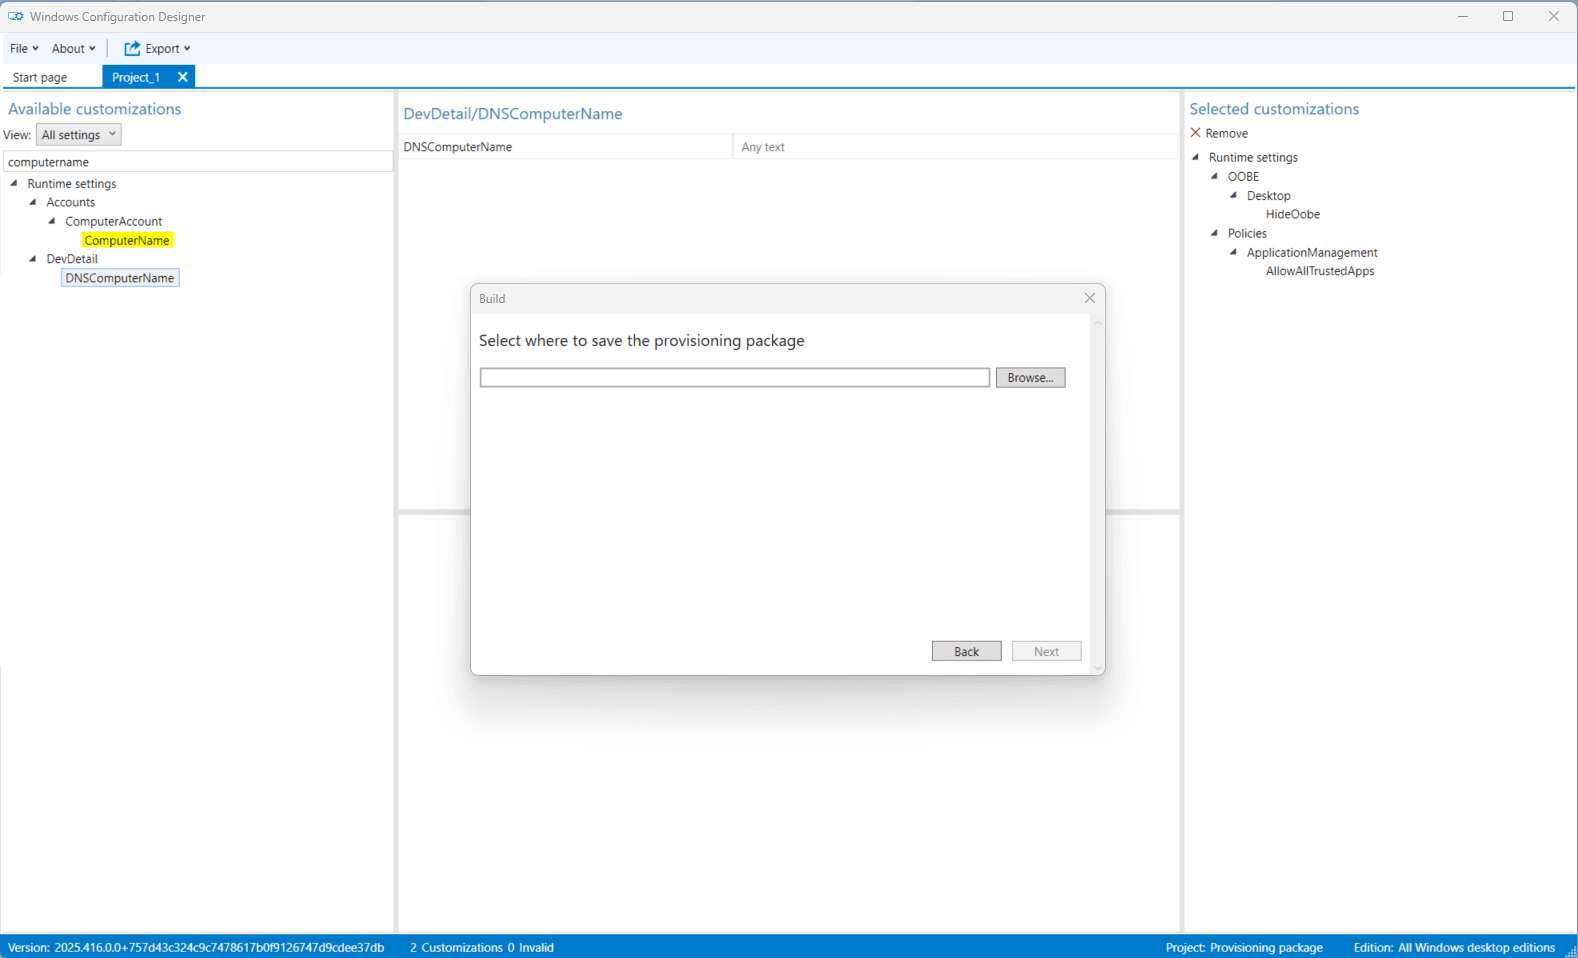
- Click Build.

You will see a confirmation message:
- ✅ Provisioning package has been successfully saved, along with the location.
2.4 Active Directory Device Disjoin Account Preparation
To facilitate the disjoining of devices from a Local Active Directory (AD) domain during migration, it is necessary to establish a dedicated standard user account with delegated permissions must be created in the source Active Directory environment. This account is used by the Opsole Migrate agent to perform the disjoin operation on Hybrid or AD-joined devices before they are re-registered into Microsoft Entra ID.
Step 1 — Create Delegated AD Account
-
On your domain controller, open the Active Directory Users and Computers console (
dsa.msc). -
Create a new user account within your designated Organizational Unit (OU).
- Set a strong password for the account.
- Verify that the account is not subject to any Group Policy Objects (GPOs) or security policies that might restrict remote access.
- Confirm the account can log in remotely to domain-joined PCs.
Step 2 — Delegate Control to the Computers OU
- In Active Directory Users and Computers, navigate to the OU that contains the computers targeted for migration.
- Right-click the OU and select Delegate Control...
- In the Delegation of Control Wizard:
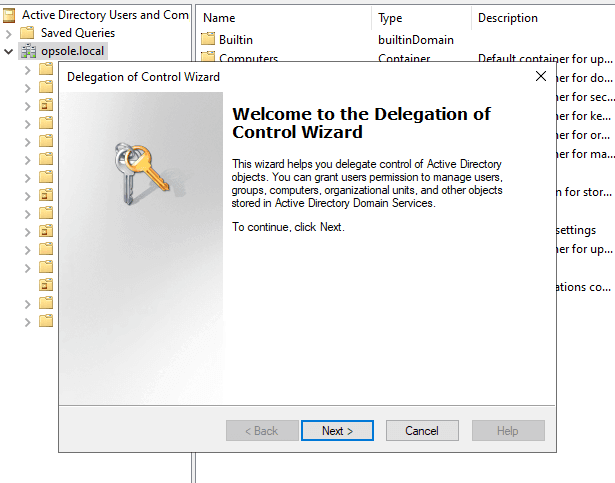
- Select the user account you created in Step 1 and click Next.

-
On the Tasks to Delegate screen:
- Choose Create a custom task to delegate.
- Click Next.

-
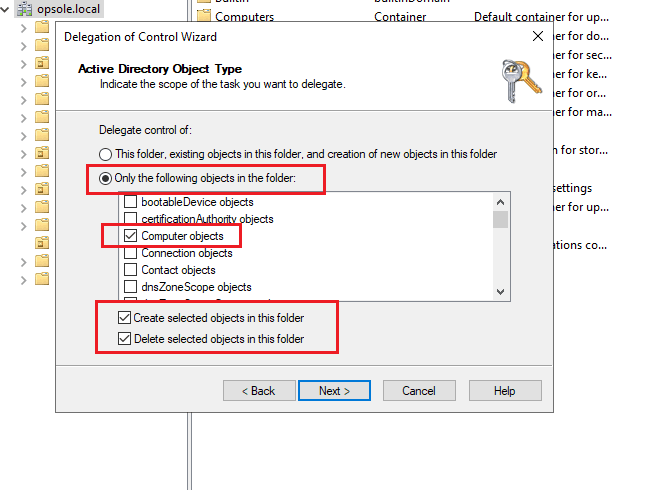
In the Active Directory Object Type window:
-
Select Only the following objects in the folder.
-
Check:
- ✅ Computer objects
- ✅ Create selected objects in this folder
- ✅ Delete selected objects in this folder
-
-
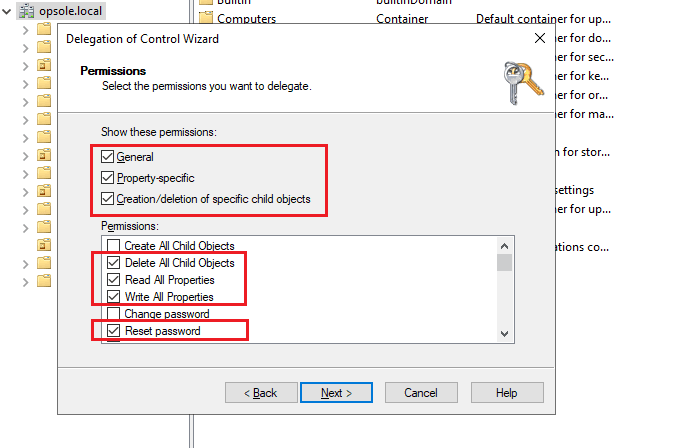
In the Permissions window:
-
Select:
- ✅ General
- ✅ Property-specific
- ✅ Creation/deletion of specific child objects
-
Under Permissions, check the following:
- ✅ Delete All Child Objects
- ✅ Read All Properties
- ✅ Write All Properties
- ✅ Reset Password
-
- Click Next, review your settings, and click Finish to complete the delegation.
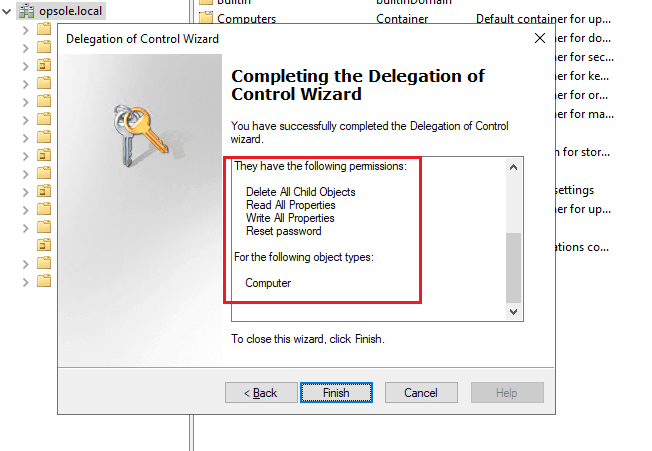
✅ The user account now has the required delegated rights to disjoin computer objects from Active Directory.
Next steps
- Continue to setup: Opsole Migrate Portal Setup
How is this guide?
OpsoleMigrate Prerequisites
This document outlines all requirements needed before starting a device migration. It includes licensing, supported device states, hardware and network prerequisites, Graph API permissions, and the steps to register the Opsole Migrate application in Microsoft Entra ID.
Opsole Migrate Portal Setup
This document explains how to configure the Opsole Migrate Portal for device migration, including adding tenant details, registering application credentials, uploading provisioning packages, and preparing the environment for Hybrid-to-Entra and Tenant-to-Tenant migration scenarios.