Portal Configuration
Configure Opsole Migrate portal settings for device migration, including AD disjoin credentials, recovery options, profile migration behavior, device attributes, group assignment, and validated provisioning package upload.
1. Portal Configuration
After completing prerequisite validation and portal onboarding, configure the additional Opsole Migrate portal settings required before scheduling or starting migrations.
1.1. Open Additional Configuration
After successfully saving your initial Entra ID configuration during onboarding, Navigate to Settings > Configuration in the portal.
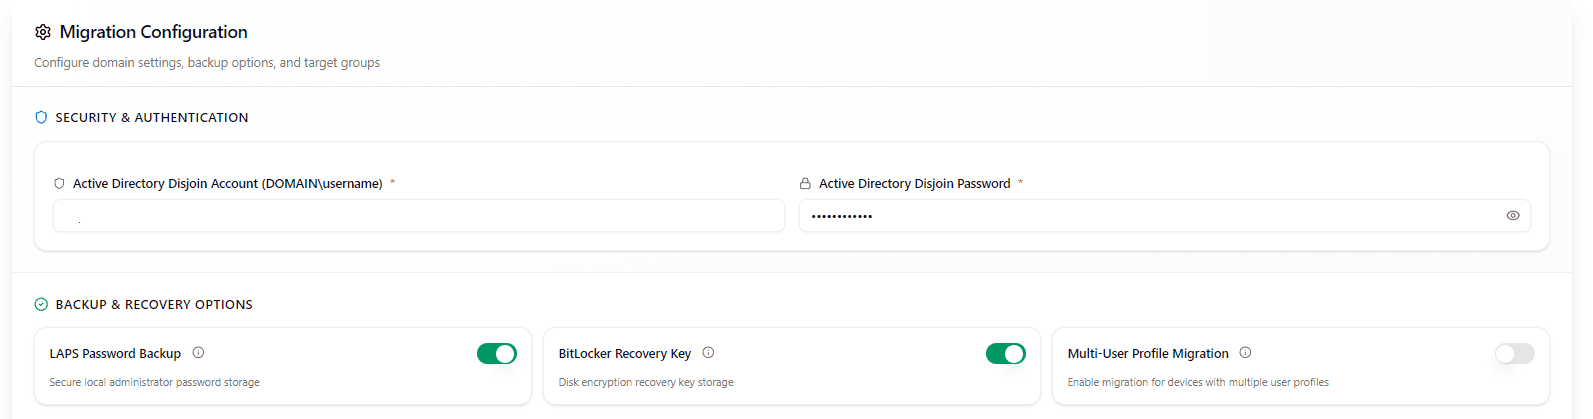
1.2. Security and Authentication
Active Directory Disjoin Account
Specify the AD account used to disjoin devices from the source Active Directory domain during migration.
Use the format:
DOMAIN\usernameThis setting applies as follows:
| Migration scenario | AD disjoin account required |
|---|---|
| AD-to-Entra | Required |
| Hybrid-to-Entra | Required |
| Tenant-to-Tenant from AD-joined or Hybrid-joined source devices | Required |
| Tenant-to-Tenant from Entra ID joined source devices only | Not required |
The account must be valid in the source AD environment and must have delegated permissions to disjoin target devices from the correct OU scope.
Active Directory Disjoin Password
Enter the password for the AD disjoin account.
Before saving, confirm that:
- The account is active and not locked out.
- The password is current and not expired.
- The account was validated on a representative test device.
- The account is delegated on the OU or OUs containing target devices.
1.3. Backup and Recovery Options
LAPS Password Backup
Enable this option only if approved by your organization's recovery and security policy.
When enabled, Opsole Migrate stores local administrator password recovery information for recovery assurance during migration.
BitLocker Recovery Key
Enable this option to back up the BitLocker recovery key for recovery scenarios during or after migration.
Before enabling, confirm that:
- BitLocker recovery handling is approved by the security team.
- Support teams know where recovery data is available.
- Access to recovery data is governed and audited according to your internal policy.
1.4. Profile Migration Options
Multi-User Profile Migration
Multi-user profile migration is disabled by default.
- When enabled, all supported user profiles on the device are migrated.
- When disabled, only the currently logged-in user profile is migrated.
Enable this option for shared-device or multi-profile scenarios only after pilot validation.
Multi-user profile migration can increase migration runtime depending on the number and condition of profiles on the device.
This is a global setting and applies to all migrations.
1.5. Device Configuration
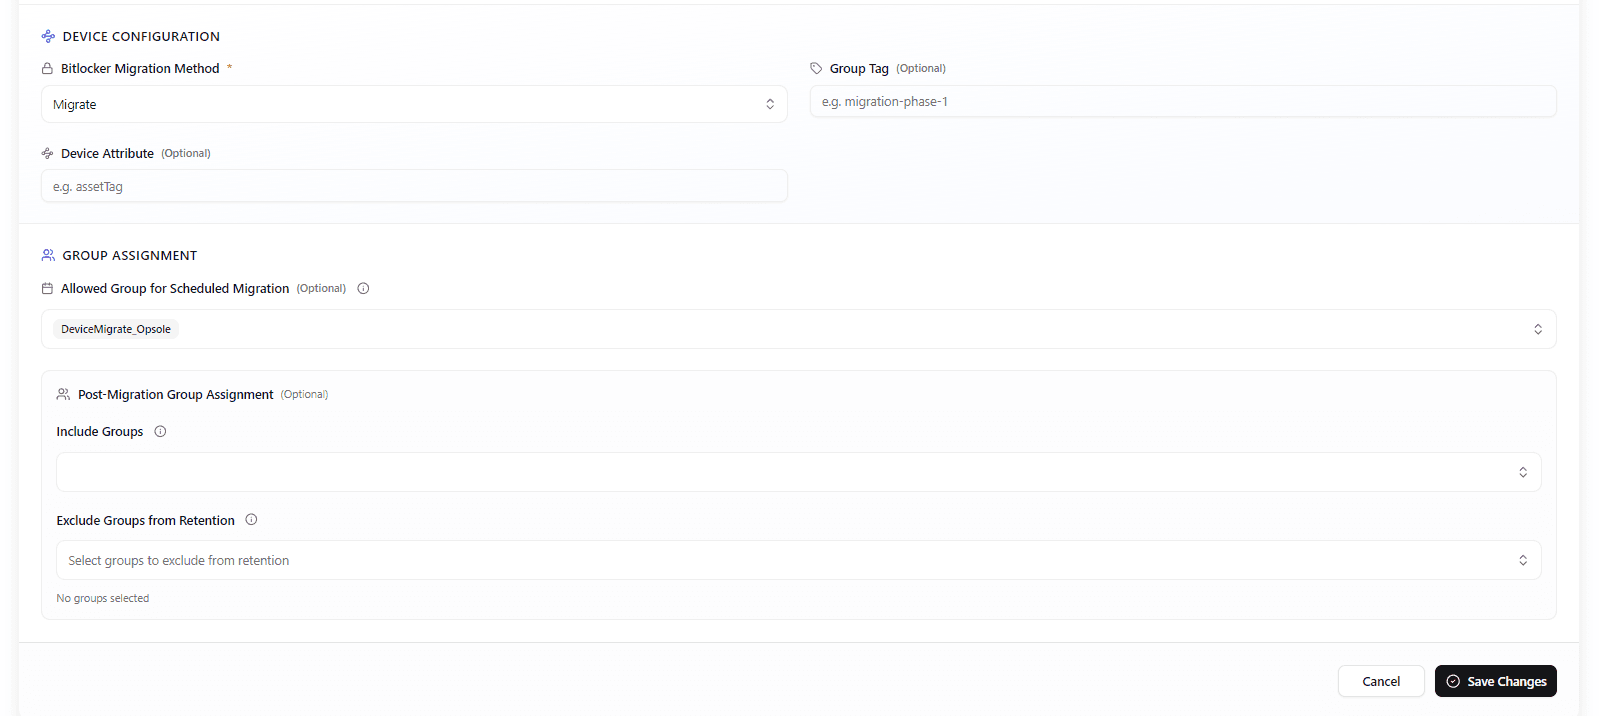
BitLocker Migration Method
Select the BitLocker handling method that matches the approved encryption and recovery plan for the migration project.
Group Tag
Optional. Used for Autopilot or dynamic group targeting after migration.
Device Attribute
Optional. Used for custom grouping, automation, reporting, or dynamic device assignment in the target tenant.
1.6. Group Assignment and Retention
Post-Migration Group Assignment
Selected groups are automatically assigned to the device after successful migration.
Use this option for target-state assignments such as migrated device groups, baseline policy groups, or post-migration application groups.
Exclude Groups from Retention
By default, devices can be reassigned to their original cloud groups after migration where group restoration is enabled.
Use this option to exclude groups that should not be restored in the target state, such as legacy, source-only, or conflicting policy groups.
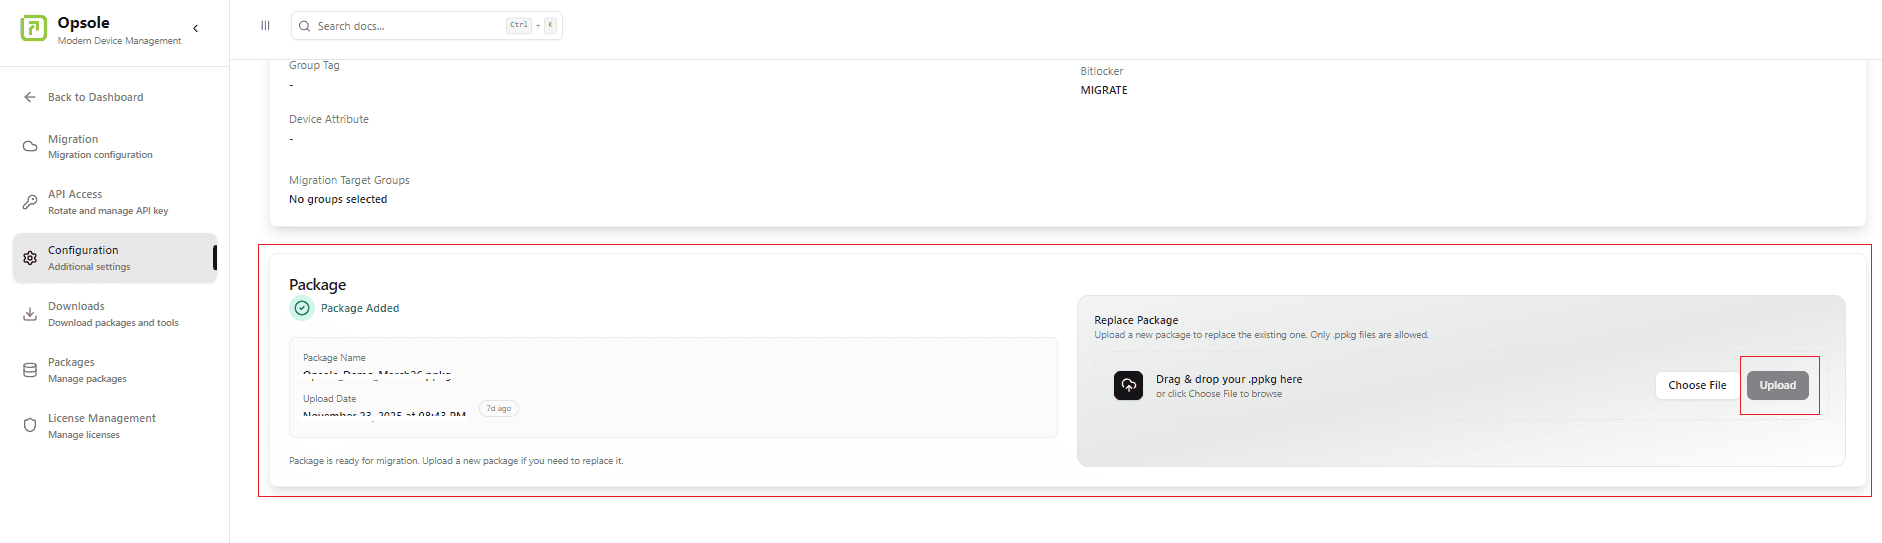
2. Provisioning Package Upload
Upload only a validated provisioning package (.ppkg) created with Windows Configuration Designer.
To upload the provisioning package:
- Navigate to Settings > Configuration.
- Locate the Package section.
- Click Upload Package.
- Choose the package expiry date.
- Upload the validated provisioning package.
Use the correct package for your migration scenario:
| Migration scenario | Package to upload |
|---|---|
| AD-to-Entra or Hybrid-to-Entra | Package created for the tenant the device will join after migration |
| Tenant-to-Tenant | Package created using the destination target tenant |
Configuration Completion
After all required settings are configured and saved, the portal configuration is complete.
You are now ready to continue to the migration readiness checklist and start migration preparation.
Next Steps
- Continue to Start Your Migration
How is this guide?
Getting Started
Onboard your organization to the Opsole Migrate portal after prerequisite validation, including account registration and initial portal setup.
Migration Process
Step-by-step walkthrough of installing Opsole Migrate on the device, launching the tool, and completing the migration. Applies to AD-to-Entra, Hybrid-to-Entra, and Tenant-to-Tenant scenarios.